Wearing the Boy Scout uniform correctly is more than just a matter of tradition—it’s about respect, pride, and unity. For both new scouts and seasoned members, understanding boy scout uniform patch placement is essential. Each patch tells a story, reflects achievements, and marks progress in the scouting journey. That’s why it’s important to get it right.
The Importance of Correct Patch Placement
The Boy Scout uniform is not just a dress code; it’s a symbol of belonging. Each piece of the uniform has a specific purpose, and every patch is placed with intention. Misplacing a patch can give the impression of inexperience or neglect. That’s why understanding boy scout uniform patch placement from the start is crucial.
Beyond the rules, correctly placed patches help scouts take pride in their achievements and help others recognize them. It also creates a sense of unity across troops and regions.
Types of Boy Scout Uniform Patches
Before diving into placement, it’s helpful to identify the kinds of patches typically seen on a uniform. Common categories include:
Council Shoulder Patch (CSP)
Unit Numerals
Patrol Emblems
Rank Badges
Position Badges (like Patrol Leader, Senior Patrol Leader)
World Crest
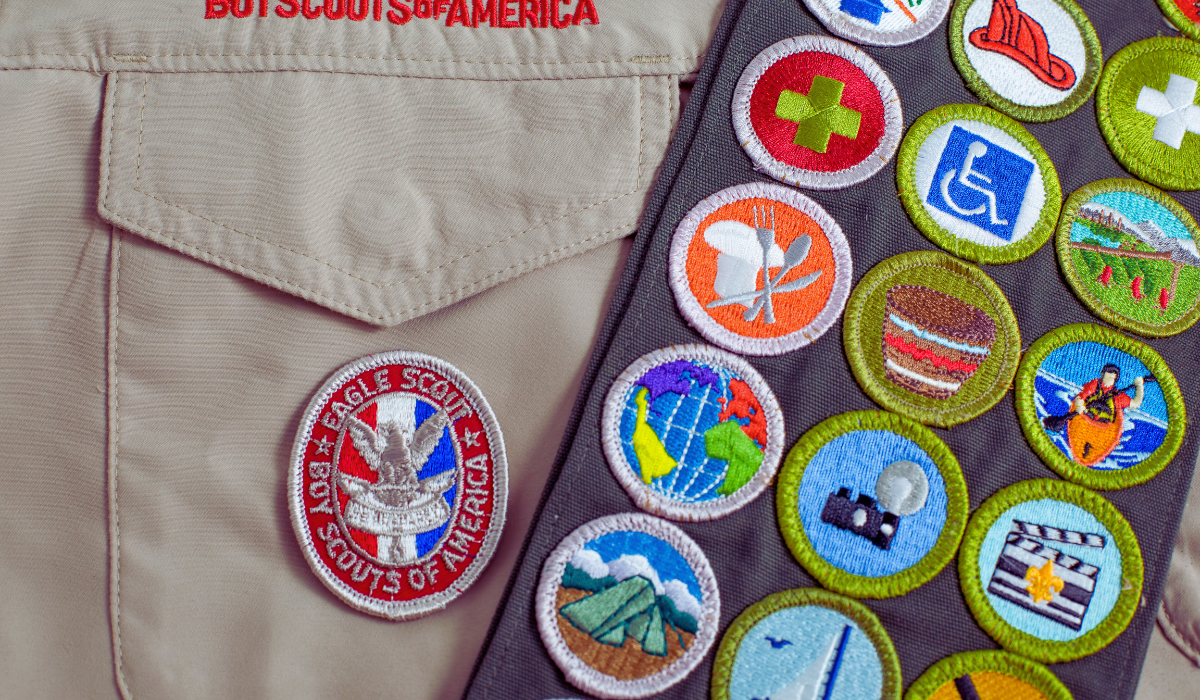
Merit Badges (on the sash, not shirt)
Temporary Patches and Event Badges
Each one has a designated location and plays a role in reflecting a scout’s role and achievements.
Left Sleeve Patch Placement
Let’s begin with the left sleeve, one of the most visible areas for patches.
Council Shoulder Patch (CSP)
Location: Top of the left sleeve, directly under the shoulder seam.
Purpose: Identifies the local council the scout belongs to.
Note: Only one council patch is worn at a time.
Unit Numerals
Location: Directly below the council patch.
Purpose: Shows the troop number.
Tip: Ensure numerals are aligned and evenly spaced.
Quality Unit Award (if earned)
Location: Below the unit numerals.
Purpose: Recognizes troops that meet high performance standards.
Note: This patch is optional and changes annually.
Right Sleeve Patch Placement
The right sleeve also holds important symbols of the scouting journey.
American Flag
Location: Top of the right sleeve, just below the shoulder seam.
Purpose: Represents patriotism and the national identity of the BSA.
Note: This patch is pre-sewn on most uniforms.
Patrol Emblem
Location: Centered on the sleeve, below the flag.
Purpose: Identifies the patrol a scout belongs to.
Trained Patch (if earned)
Location: Just below the patrol emblem.
Purpose: Indicates that the scout has completed leadership training.
Left Pocket Placement
This area highlights rank and honor.
Rank Badges
Location: Center of the left pocket.
Purpose: Shows the scout’s current rank (e.g., Tenderfoot, Second Class, Eagle).
Note: Only the most recently earned rank is displayed.
Arrow of Light Award (if applicable)
Location: Below the pocket.
Purpose: A special Cub Scout award allowed to be worn on the Boy Scout uniform.
Medals or Knots
Location: Above the pocket.
Purpose: Recognizes awards from Cub Scouts or special achievements.
Tip: Limit to three knots for a clean look.
Right Pocket Placement
The right pocket offers more flexibility.
Temporary Patches
Location: Center of the pocket or hung from the button.
Purpose: Commemorates specific events or camps.
Note: Only one temporary patch should be worn at a time.
Interpreter Strips (if earned)
Location: Just above the “Boy Scouts of America” strip on the right chest.
Purpose: Indicates fluency in other languages or ASL.
Merit Badge Sash
Though not worn all the time, the merit badge sash is a key part of the uniform during formal events.
Location: Worn over the right shoulder across to the left hip.
Placement: Merit badges are sewn in even rows, starting from the top.
Tip: Use a clean layout for readability and presentation.
The sash is worn during court of honors, parades, or other ceremonial occasions. It’s not a replacement for the regular uniform shirt patches.
Uniform Inspection Tips
To maintain standards, some troops conduct regular uniform inspections. Here are tips to ensure your boy scout uniform patch placement is always correct:
Check the BSA uniform guide – It’s updated occasionally and remains the ultimate authority.
Use a measuring tape – Proper spacing (usually about ½ inch between patches) improves neatness.
Sew carefully or use adhesive backing – Avoid crooked or loose patches.
Ask a leader – When in doubt, troop leaders can guide you.
Common Mistakes to Avoid
Misplacement happens most often due to misunderstandings. Here are some errors to watch out for:
Wearing multiple temporary patches at once.
Stacking too many award knots.
Placing rank badges too low or off-center.
Confusing Cub Scout patches with Boy Scout ones.
Ironing on patches that should be sewn (they may fall off during washing).
Maintaining the uniform properly shows discipline and attention to detail—two core Scouting values.
Custom Patches and Replacements
For personalized troop patches or specialty designs, working with a reliable custom patch supplier is key. Sites like allembroidered offer custom embroidery services for scout troops, making it easy to reorder or customize patches that meet BSA guidelines while adding unique flair.
This can be especially helpful when replacing lost or worn patches or creating troop-specific awards for events or milestones.
Final Thoughts on Boy Scout Uniform Patch Placement
The Boy Scout uniform is more than clothing—it’s a canvas of personal achievement, commitment, and pride. Following proper boy scout uniform patch placement ensures each uniform tells a clear and accurate story of the scout’s journey.
Whether you’re sewing patches on for the first time or updating your sash with a new merit badge, each detail matters. Getting the placement right is a small but powerful way to honor the values of Scouting.
By understanding these standards and maintaining uniform discipline, scouts not only show respect for tradition but also build a deeper connection to their troop, community, and the movement as a whole.