Mold mitigation is a professional, multi-step process designed to remove mold contamination, eliminate the underlying moisture source, and restore a home’s indoor environment to a safe condition. It goes far beyond simply cleaning a visible spot on the wall, involving containment, physical removal of infested materials, and a thorough cleaning and drying protocol. This systematic approach is the only way to ensure the mold does not return and that the air inside a home is clean and safe to breathe.
Finding mold in your home can be concerning, as it often points to a hidden water problem that can affect both your property’s integrity and your family’s health. To help homeowners understand what’s involved, this guide breaks down the professional mold mitigation process. It explains what experts do and why their methods are so important for creating a truly safe living space.
Why Mold Is More Than Just a Surface Stain
The presence of mold is a clear sign of a moisture problem. But the mold itself also creates its own set of issues, primarily by degrading indoor air quality. An active mold colony is a tiny biological factory that releases microscopic particles into the air.
- Mold Spores: These are the reproductive “seeds” of mold. They are incredibly small and light, allowing them to travel easily through the air. When inhaled, they can trigger allergic reactions, asthma attacks, and other respiratory problems in sensitive individuals.
- Microbial Volatile Organic Compounds (MVOCs): As mold digests organic materials like wood and drywall paper, it releases gases. These MVOCs are what cause the distinct, musty odor associated with mold. Exposure to these compounds can lead to headaches, dizziness, and other unpleasant symptoms.
According to the Environmental Protection Agency, the air inside a home can be significantly more polluted than the air outside, and mold is a major contributor to this indoor pollution. A musty smell is not just an annoyance; it’s a direct indicator that these contaminants are present in the air.
The Professional Mold Mitigation Process Step-by-Step
A certified mold professional will follow a strict protocol to ensure the problem is handled safely and effectively.
1. Assessment and Identifying the Moisture Source
The first and most important step is to find out why the mold is growing. Mold needs moisture to survive, so there is always a source. This could be a plumbing leak, a roof leak, high indoor humidity, or condensation on cold surfaces. A professional will use tools like moisture meters and thermal imaging cameras to locate this source. Without fixing the water problem, any mold cleanup will be temporary at best.
2. Containment of the Affected Area
This step is critical for protecting the rest of your home. Before any removal begins, technicians will build a containment barrier around the affected area using heavy-duty plastic sheeting. They will seal off all doorways, windows, and HVAC vents. Then, they establish negative air pressure inside the containment zone using an “air scrubber” that is ducted to the outside. This ensures that any mold spores disturbed during the cleanup are vented out of the house, not spread to other rooms.
- Bonus Tip: Proper containment is the single biggest difference between professional mitigation and a DIY attempt. Scrubbing mold without containment can aerosolize millions of spores, turning a localized problem into a whole-house contamination.
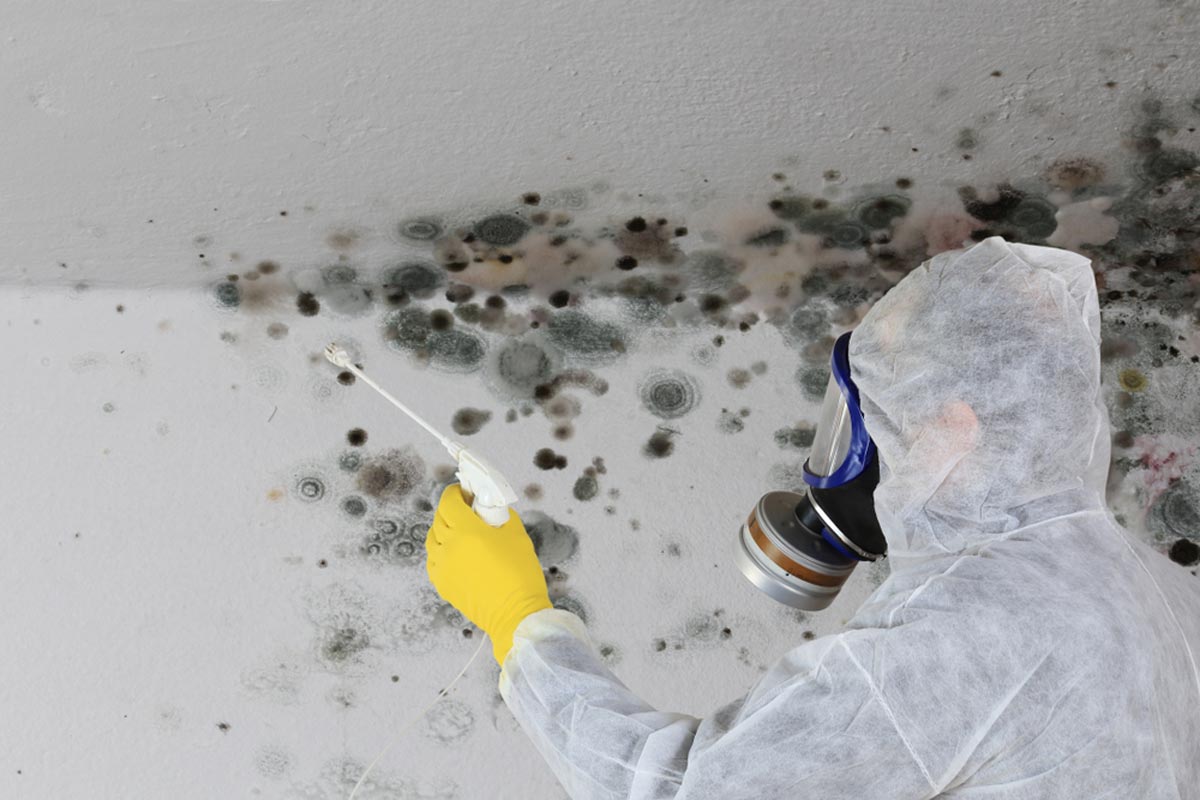
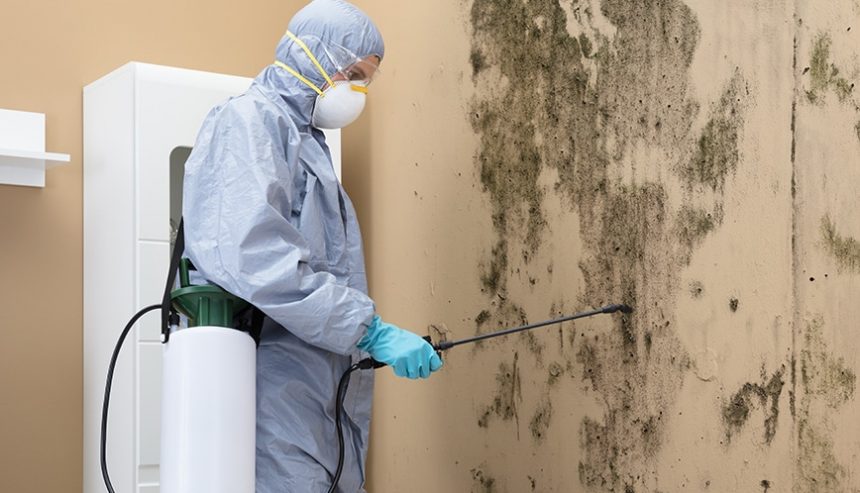
3. Removal of Contaminated Materials
Mold is like a plant with roots (called hyphae) that grow deep into porous materials. Simply spraying the surface with a chemical will not kill these roots. For this reason, industry standards require the physical removal of any porous, mold-infested materials. This includes:
- Drywall
- Insulation
- Carpet and carpet padding
- Ceiling tiles
These materials are carefully cut out, placed in sealed bags while still inside the containment area, and then removed from the property.
4. Cleaning and Disinfection
Once the contaminated materials are gone, the remaining structural elements, such as wood studs and concrete, need to be cleaned. This is a multi-step process. First, all surfaces are vacuumed with a specialized vacuum cleaner equipped with a HEPA filter to capture any loose spores. Then, the surfaces are wiped down with a cleaning agent. For some situations, an EPA-registered antimicrobial may be applied to kill any remaining mold and prevent its return.
5. Drying and Verification
After the cleaning is complete, the area must be thoroughly dried. Professionals use industrial-grade dehumidifiers and air movers to remove any residual moisture from the air and the building materials. They monitor the process with moisture meters to ensure the wood and concrete have returned to their normal, dry state. The job isn’t finished until the structure is verifiably dry.
Comparing Professional Mitigation with a DIY Approach
The vast difference between this professional protocol and a common DIY approach highlights why certified methods are so important for a home’s safety and air quality.
| Task | DIY Approach | Professional Mitigation |
|---|---|---|
| Source Identification | Often overlooked. The focus is only on the visible mold. | A primary goal. The moisture problem is identified and fixed to prevent regrowth. |
| Containment | Usually none. Spores are spread freely during cleaning. | Full containment with negative air pressure is a mandatory first step. |
| Removal Method | Spraying bleach on the surface, which is ineffective on porous materials. | Physical removal of all contaminated porous materials. |
| Air Cleaning | No air filtration, leaving spores to settle elsewhere. | Continuous HEPA air scrubbing to capture airborne contaminants. |
| Final Result | Mold often returns quickly. Air quality can be made worse. | Mold is removed, the source is fixed, and air quality is restored to a healthy level. |
Things to Consider Before Starting a Mitigation Project
Knowing what to look for can help you choose a qualified professional to handle your mold issue.
The Importance of Certification
Look for companies whose technicians are certified by the Institute of Inspection, Cleaning and Restoration Certification (IICRC). An IICRC certification in Applied Microbial Remediation (AMRT) indicates that the technician has been trained in the industry-standard protocols for safe and effective mold removal.
The Role of Independent Testing
For large-scale or complex mold issues, it’s often a good idea to hire an independent industrial hygienist to perform air quality testing both before and after the mitigation work. Pre-testing can identify the types and concentrations of mold, while post-remediation verification (also called a clearance test) confirms that the job was successful.
- Bonus Tip: Be cautious of companies that offer to do both the testing and the remediation. This is a potential conflict of interest. The most reliable results come from a third-party testing company that has no financial stake in the outcome of the cleanup.
Common Questions About Mold Mitigation
Can’t I just use bleach to kill the mold?
No. While bleach may kill surface mold on a non-porous surface like tile, it is ineffective on porous materials like drywall or wood. The roots of the mold remain, and the water in the bleach can actually feed the underlying growth.
What’s the difference between mold mitigation and mold removal?
While people often use the terms interchangeably, “removal” is just one step in the larger process of “mitigation.” True mitigation addresses the entire problem: it includes fixing the moisture source, containing the area to prevent spread, removing the mold, cleaning the air, and drying the structure to prevent recurrence.
Is all indoor mold dangerous?
While certain types of mold can produce toxins, all indoor mold growth should be treated as a problem. All molds release spores and particulates that can cause allergic reactions and degrade indoor air quality.
How long does a professional mold mitigation project take?
The timeline depends on the size and complexity of the job, but a typical project in a single area of a home often takes from one to five days to complete the containment, removal, and cleaning phases.
How can I prevent mold from coming back after mitigation?
The key to preventing mold is moisture control. This includes fixing any leaks promptly, ensuring your home has adequate ventilation (especially in bathrooms and kitchens), and keeping indoor humidity levels below 50 percent.
Ensuring a Safe and Healthy Home
Ultimately, professionals restore mold mitigation is a systematic, science-based process that does more than just remove an ugly spot. It’s about creating a genuinely safe indoor environment by eliminating contamination at its source and cleaning the air you breathe. For any homeowner facing a mold issue, working with a professional, certified service is the most effective way to protect both the property and the family’s health.
For those who suspect a mold problem, the recommended first step is a professional assessment. A qualified team with certified technicians will have the proper equipment to handle the job safely and effectively. For instance, services like Prestige NW Restoration offer inspections and can provide more information on the mitigation process; they can be reached at (360) 334-3624 or by email at [email protected].
Reviewer: Matthew Moore brings over 15 years of experience in residential renovation marketing. The review provided helped shape this content to better connect with homeowners seeking reliable, high-quality restoration and home improvement services.