Old insulation is a little like that lumpy mattress in the guest room—you know it’s past its prime, but you keep avoiding the hassle of replacing it. The problem is, insulation doesn’t just “stop working.” It can hold onto moisture, harbor pests, and lose effectiveness, all while silently driving up energy bills.
When the Insulation Removal Process reaches the point where it’s no longer doing its job, removal isn’t optional—it’s necessary. But pulling it out is not as simple as rolling up a carpet and tossing it. Fibers, dust, and contaminants can pose health risks, and rushing the job can damage your property. These eight expert tips will help you remove insulation without creating a bigger problem than the one you’re trying to solve.
1. Start with a Complete Inspection
The smartest insulation removal projects start with a thorough look at what you’re dealing with. Think of it as the “scouting mission” before the main job begins.
Identify the Type of Insulation
Different insulation materials require different removal approaches.
- Fiberglass batts often come out in sheets but shed fibers easily.
- Cellulose insulation is loose and dusty, requiring vacuum extraction for efficiency.
- Spray foam bonds tightly to surfaces and usually needs cutting tools.
Understanding the type you have will help you choose the safest, fastest method.
Look for Contaminants
Contaminated insulation must be handled more carefully to avoid spreading harmful particles. Watch for:
- Rodent droppings or nesting materials
- Dark spots indicating mold growth
- Signs of water damage or roof leaks
Pro tip: If you suspect asbestos-containing insulation (often found in homes built before the 1990s), stop immediately and arrange for professional testing.

2. Wear the Right Protective Gear
Insulation removal means you’re stepping into a dusty, particle-filled environment. Protection keeps the job safe and less uncomfortable.
Respiratory Protection
A respirator rated for fine particulate matter (N95 or better) filters out the tiny airborne fibers and dust that regular masks miss. Breathing without one is like inhaling tiny shards of glass—definitely not worth the risk.
Skin and Eye Protection
Long sleeves, gloves, and goggles keep irritation at bay. Fiberglass in particular can cause itching that lasts hours if it gets under your skin.
Fun Fact: Fiberglass particles can stay airborne for up to eight hours after you disturb them, making cleanup and protective wear just as important after removal as during it.
3. Seal the Work Area
Containment is the unsung hero of a clean insulation removal project. Without it, you risk tracking dust and fibers through the rest of the property.
Isolate the Space
Close doors, tape plastic sheeting over entryways, and cover vents to keep particles from circulating through your HVAC system.
Maintain Negative Air Pressure
A box fan in a window or a specialized ventilation fan can pull air out of the room and prevent contaminants from drifting into living spaces.
Why it matters: Uncontrolled dust can travel through ductwork and land in places you’ll be cleaning for months.
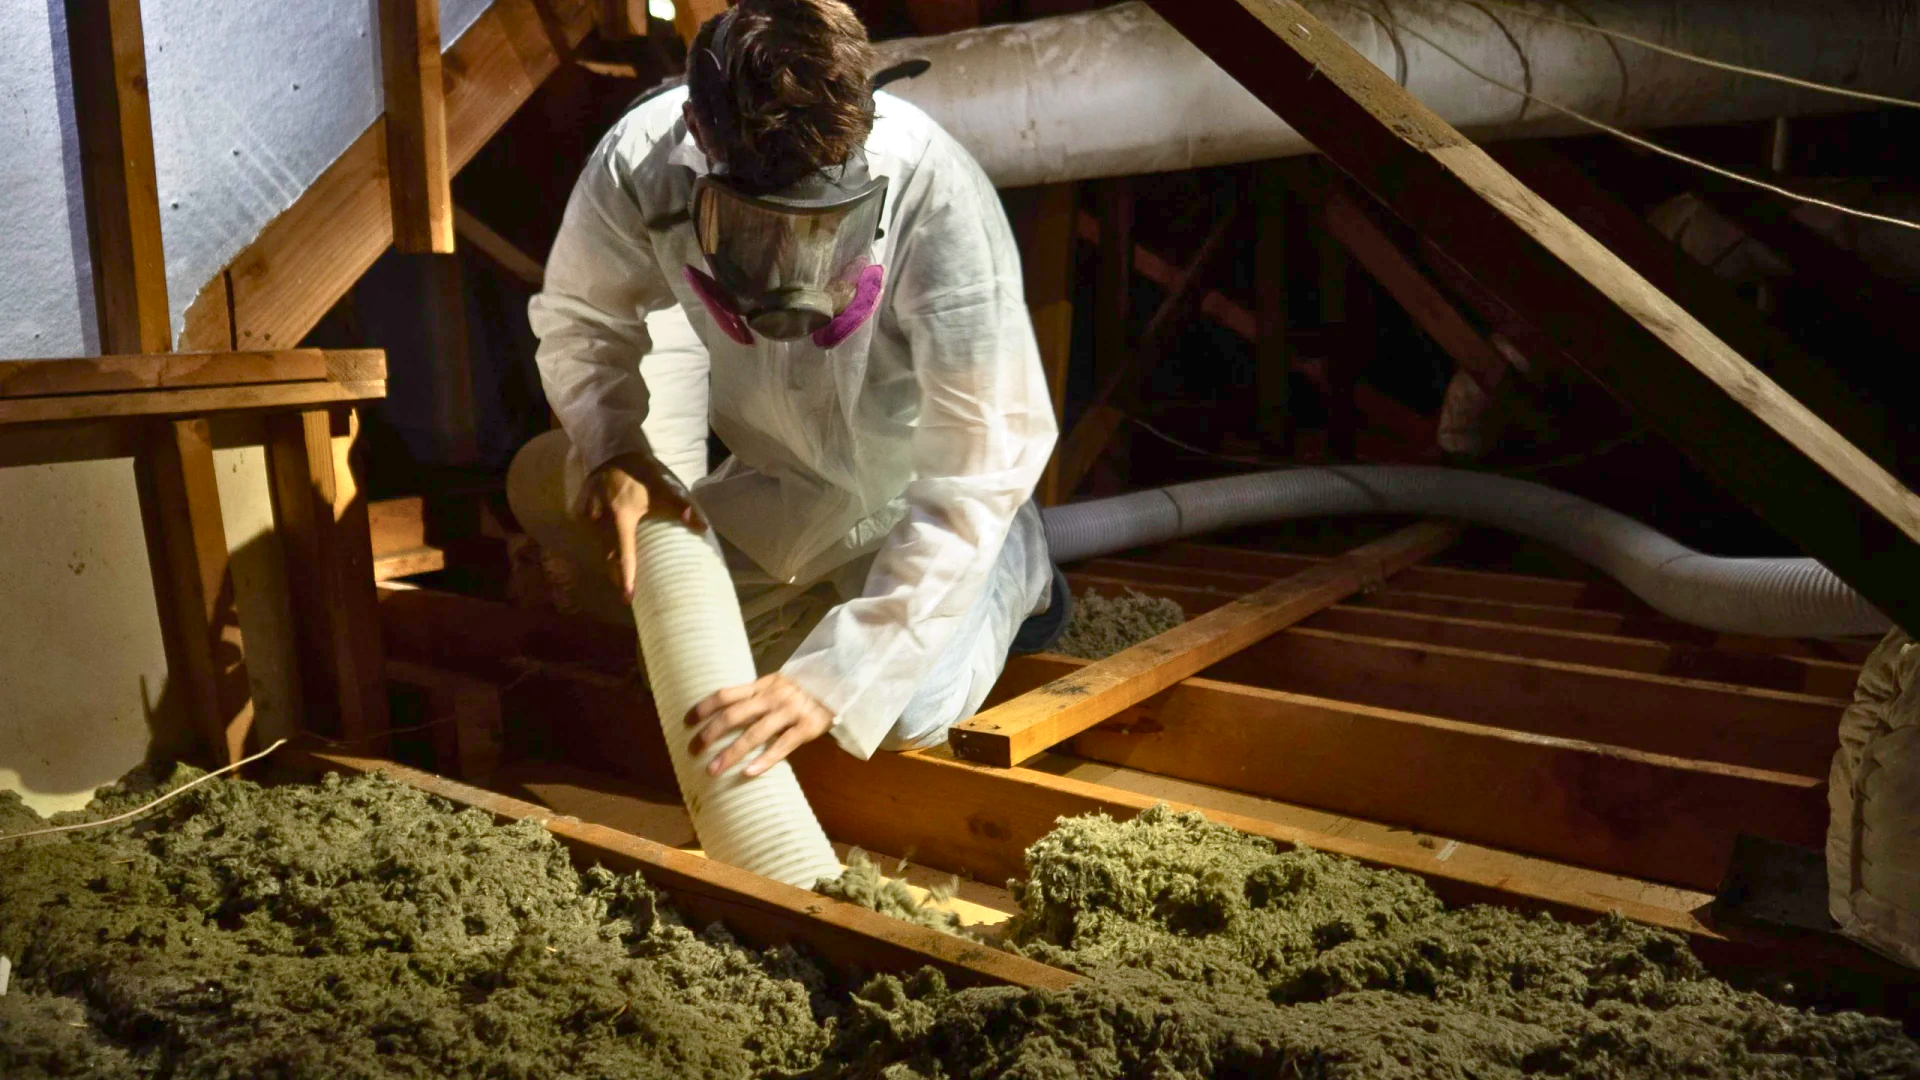
4. Use the Right Tools for the Job
Trying to remove blown-in insulation with a shovel or scoop will make you wish you hadn’t started. The right tools make the process far smoother.
Vacuums for Blown-In Insulation
Industrial insulation vacuums connect to large collection bags and can remove huge volumes of material in hours instead of days.
Hand Removal for Batts
Fiberglass batts or rolls can be pulled up and rolled tightly before bagging. Work slowly to keep fibers from breaking loose.
Comparison Table: Tools for Different Insulation Types
| Insulation Type | Best Removal Tool | Notes |
|---|---|---|
| Fiberglass batts | Hands + heavy-duty gloves | Roll and bag; avoid tearing |
| Cellulose (blown-in) | Insulation vacuum | Fast, reduces dust spread |
| Spray foam | Oscillating multi-tool or saw | Cut carefully to avoid damage |
| Rock wool batts | Hands + protective gear | Similar to fiberglass but heavier |
5. Work in Manageable Sections
Breaking the job into smaller areas prevents burnout and keeps the workspace organized.
Divide and Conquer
Start in one corner and work methodically to the opposite side. This ensures you don’t miss hidden areas or accidentally double-handle sections.
Watch for Hidden Obstacles
Be mindful of nails, electrical wiring, and plumbing lines. A little extra caution can save you from costly repairs.
Fun Fact: In an average 1,200 sq. ft. attic, blown-in cellulose can weigh more than 1,200 pounds. That’s like hauling out a small car—one bag at a time.
6. Bag and Dispose of Insulation Properly
Once insulation is out, your next goal is to keep it contained and get it out of the building.
Use Heavy-Duty Bags
Contractor-grade plastic bags won’t rip when filled with insulation and nails or staples that might still be attached.
Follow Disposal Guidelines
Some regions require special handling for contaminated insulation. Check your local landfill rules—throwing it in with household trash may not be allowed.
7. Clean the Area Thoroughly Before Replacement
Even if the insulation is gone, particles can linger on surfaces and in the air.
Vacuum and Wipe Surfaces
Use a HEPA vacuum to pick up fine debris from joists, rafters, and the floor. Follow with damp wiping to trap any remaining dust.
Inspect for Damage
Without insulation covering everything, it’s the perfect time to look for:
- Cracks or gaps where air leaks in
- Signs of pest entry
- Wood rot or structural wear
Address these before putting in new insulation for the best performance.
8. Plan for a Smooth Installation of New Insulation
The removal process sets the stage for your next upgrade.
Repair and Seal
Seal air leaks, patch holes, and make sure the surface is completely dry. New insulation on a damp surface is a recipe for mold growth.
Choose the Right Replacement
Select insulation with the right R-value for your climate zone and building design. If energy efficiency is a priority, consider higher-performance materials that deliver more insulation per inch.
Common Questions About Insulation Removal
How Do I Know If My Insulation Needs to Be Removed?
Look for visible mold, pest droppings, water damage, or severe settling. If insulation looks damp or smells musty, it’s probably not doing its job.
Can I Remove Insulation Without Professional Equipment?
For small batts, yes. For blown-in materials, professional vacuums make removal faster and less messy.
Is Old Insulation Hazardous?
It can be. Older insulation may contain asbestos or other harmful materials. Even modern fiberglass can cause irritation if inhaled or touched.
Should I Remove All Insulation Before Adding More?
Only if the existing insulation is damaged or contaminated. In other cases, topping up with new material can be effective.
What’s the Safest Way to Dispose of Removed Insulation?
Bag it in heavy-duty plastic and take it to a facility that accepts construction waste. Never burn it—insulation can release harmful fumes when combusted.
Conclusion
Insulation removal is one of those projects where preparation pays off in a big way. By starting with a full inspection, wearing the right protection, containing the workspace, and using proper tools, you avoid the mess, hazards, and frustration that come from rushing the job.
Learn more: https://prestigeinsulationsolutions.com/?utm_source=backlink
Breaking the work into sections, disposing of materials properly, and cleaning thoroughly before installing new insulation ensures your efforts deliver a real improvement in comfort and energy efficiency. The end result is a cleaner, healthier space that’s ready for a high-performance insulation upgrade.
Author: Rene Zamarripa, spray foam installer and owner, began in the insulation industry in 2008 with Key Insulation in San Antonio. After 17 years of hands-on experience, now owns a successful insulation company with aspirations to franchise. Knowledgeable in R-values, insulation processes, and various components used in both residential and commercial applications. Experienced in identifying the right insulation solutions for different structures, including spray foam, fiberglass, and cellulose. Trained in operating spray foam rigs, managing temperature and pressure settings, ensuring proper material mix, and following safety standards. Understands the technical and practical skills required to deliver consistent, high-quality insulation and guide others in the trade.
Reviewer: With over 13 years in spray foam insulation, Benjamin Lee reviewed this content and offered feedback aimed at helping growing businesses connect with local homeowners and commercial clients more effectively.