Professional air-sealing techniques can reduce your energy bills by 15-30% year-round by targeting the most common leakage points including attic hatches, window frames, door jambs, electrical outlets, and HVAC penetrations. The most cost-effective methods include applying caulk to stationary cracks, weather stripping for movable components, spray foam for larger gaps, and door sweeps for thresholds—with attic air-sealing delivering the highest return on investment at an average payback period of just 1-2 years.
Professional air sealing contractor create an effective thermal boundary that prevents conditioned air from escaping during both summer and winter months, leading to more consistent indoor temperatures and reduced strain on heating and cooling systems.
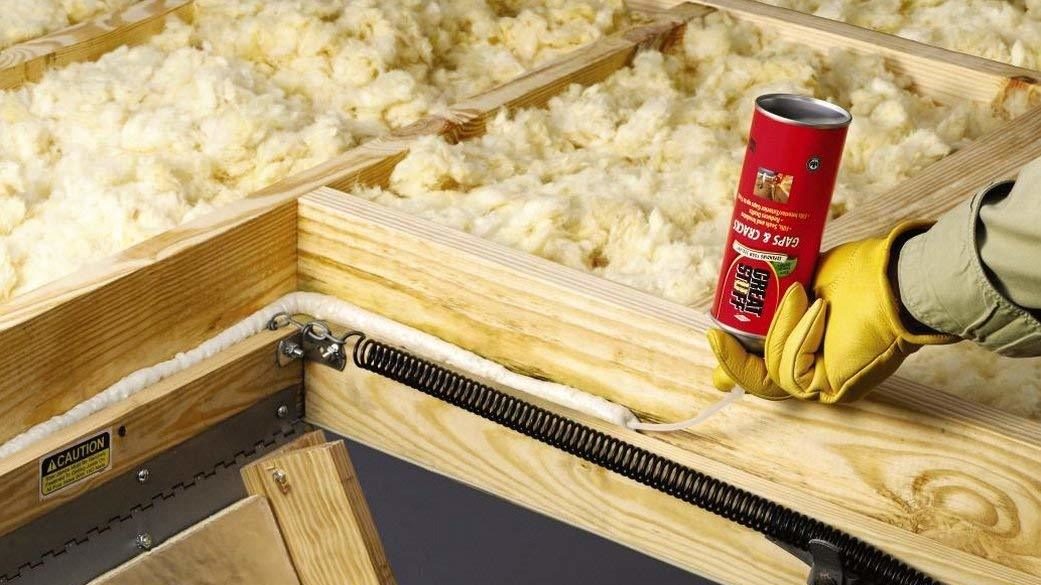
Understanding Air Leakage and Its Impact
Air leakage significantly impacts both home comfort and energy costs throughout the year. The average home loses 25-40% of its heating and cooling energy through uncontrolled air movement, with the EPA estimating that properly sealing air leaks can reduce monthly energy bills by up to 20%.
Common Air Leakage Points in Typical Homes
| Leakage Area | Percentage of Total Leakage | Difficulty to Seal | Priority Level |
| Attic Penetrations | 30-40% | Medium | Very High |
| Windows & Doors | 15-25% | Low | High |
| Electrical Outlets & Switches | 5-10% | Low | Medium |
| Plumbing Penetrations | 10-15% | Medium | High |
| Basement Rim Joists | 10-15% | Medium | High |
| HVAC Ductwork | 15-20% | Medium-High | Very High |
| Recessed Lighting | 5-10% | Medium | Medium |
| Fireplace Dampers | 5-10% | Medium | Medium |
Bonus Tip: Start your air-sealing project with a simple smoke pencil test on a windy day. Light the smoke pencil and hold it near suspected leakage points—smoke will visibly blow or be drawn in at air leak locations, helping you identify problem areas without expensive equipment.
Professional Air-Sealing Materials and Methods
The effectiveness of air-sealing depends significantly on using the right materials for specific applications. Different leakage points require different sealing approaches to create a durable, flexible, and effective air barrier.

Air-Sealing Materials Comparison
| Material | Best Applications | Durability (Years) | Ease of DIY | Flexibility |
| Caulk (Silicone) | Non-moving joints under 1/4″ | 10-20 | High | Low |
| Caulk (Acrylic Latex) | Interior cracks up to 1/4″ | 3-5 | High | Medium |
| Spray Foam (Expanding) | Gaps 1/4″ to 3″ | 30+ | Medium | Low |
| Weatherstripping (V-Strip) | Window/door moving parts | 5-10 | Medium | High |
| Weatherstripping (Foam Tape) | Door/window compression | 1-3 | High | Medium |
| Door Sweeps | Door bottom gaps | 5-10 | Medium | Medium |
| Gaskets (Outlet/Switch) | Electrical boxes | 20+ | High | Low |
| Rigid Foam Board with Caulk | Large openings, rim joists | 30+ | Medium | Low |
DIY vs Professional Air-Sealing Approaches
While many air-sealing tasks are suitable for DIY, certain complex or hard-to-reach areas benefit from professional insulation services.
Comparing DIY and Professional Approaches
| Project Component | DIY Feasibility | Tools Required | Professional Advantage | Time Investment |
| Window/Door Sealing | High | Basic hand tools | Minimal | 2-4 hours |
| Outlet Gaskets | Very High | Screwdriver | None | 1-2 hours |
| Attic Air-Sealing | Medium | Safety equipment, lights | Access, thoroughness | 8-16 hours |
| Duct Sealing | Low-Medium | Specialized tape, mastic | Equipment, access | 6-12 hours |
| Rim Joist Sealing | Medium | Foam board, saw, caulk gun | Thoroughness | 4-8 hours |
| Blower Door Testing | Not Feasible | Specialized equipment | Diagnostic capability | N/A |
| Comprehensive Air-Sealing | Low | Multiple specialized tools | Efficiency, thoroughness | 16-40 hours |
Step-by-Step Air-Sealing Process
- Assessment Phase: Conduct blower door testing to quantify air leakage and identify specific leakage points
- Prioritization: Target high-impact areas first (typically attic penetrations, then basement/crawlspace)
- Material Selection: Choose appropriate sealing materials for each application
- Preparation: Clean surfaces thoroughly to ensure proper adhesion
- Application: Apply sealing materials according to manufacturer specifications
- Verification: Conduct post-sealing blower door test to confirm improvement
- Documentation: Record air changes per hour (ACH) before and after for energy rebate qualification
Bonus Tip: When air-sealing an older home, ensure you maintain proper ventilation. Extremely tight homes may require mechanical ventilation systems to maintain indoor air quality once air leakage has been significantly reduced.
Technical Specifications for Air-Sealing Performance
Understanding technical specifications helps evaluate the effectiveness of different air-sealing approaches and set realistic expectations for improvement.
Air-Sealing Performance Metrics
| Metric | Explanation | Target Range for Efficiency | Impact on Energy Bills |
| Air Changes per Hour (ACH50) | Air volume exchanges under pressure | 3-5 ACH50 (energy-efficient) | 15-30% reduction per 5 ACH improvement |
| Cubic Feet per Minute (CFM50) | Volume of air leakage at 50 pascals | <1,000 CFM50 for average home | 5-10% reduction per 500 CFM improvement |
| Pascal Pressure Drop | Measure of home air-tightness | <3 Pa pressure differential | Correlates to improved comfort |
| R-value Impact | Effective insulation performance | Maintains stated R-value | Up to 50% improvement in insulation performance |
| Infiltration Rate (Natural) | Air exchanges under normal conditions | 0.35-0.5 ACH natural | 10-20% energy savings from optimal rate |
| Permeability Rating | Material’s ability to allow water vapor | Varies by climate zone | Prevents moisture issues |
| Temperature Differential | Indoor vs. outdoor temperature variance | <2°F between rooms | Improves comfort perception |
Air-Sealing for Different Home Types and Climates
Air-sealing approaches should be tailored to specific home construction types and local climate conditions for optimal results.
Climate-Specific Air-Sealing Priorities
| Climate Zone | Primary Concern | Top Air-Sealing Priorities | Special Considerations | ROI Timeline |
| Cold/Very Cold | Heat Loss | Attic, basement, windows | Vapor barrier placement critical | 1-2 years |
| Mixed-Humid | Balanced | Complete air barrier, ductwork | Moisture management crucial | 2-3 years |
| Hot-Humid | Cooling Loss, Moisture | HVAC penetrations, attic | Vapor-permeable materials important | 1-3 years |
| Hot-Dry | Cooling Loss | Attic, windows, doors | Solar gain reduction | 2-4 years |
| Marine | Moisture Control | Foundation, walls, windows | Manage moisture movement | 2-3 years |
Things to Consider Before Making a Decision
Before undertaking an air-sealing project, several critical factors should influence your approach:
- Home Age and Construction Type: Older homes (pre-1980s) typically have more air leakage but may require different approaches to avoid creating moisture problems.
- Ventilation Requirements: As homes become more airtight, proper ventilation becomes increasingly important. Homes sealed below 3 ACH50 typically benefit from mechanical ventilation systems.
- Existing Moisture Issues: Address any existing moisture problems before air-sealing to avoid trapping moisture within building assemblies.
- Budget Allocation: Focus first on the highest ROI air-sealing locations (typically attic, basement, and obvious drafts) before moving to lower-impact areas.
- Complementary Improvements: Air-sealing works best when coordinated with insulation improvements, as they address different aspects of the same thermal boundary.
Recent market analysis indicates that homes with documented air-sealing improvements are beginning to command 3-5% higher resale values, as energy efficiency becomes an increasingly important factor for homebuyers, with 86% of buyers citing energy efficiency as “important” or “very important” in purchasing decisions.
Common Questions About Air-Sealing
Can a house be too airtight?
While extremely airtight homes (below 3 ACH50) require mechanical ventilation systems to maintain indoor air quality, the notion that homes need to “breathe” through random air leaks is a misconception. Controlled ventilation is always preferable to random air leakage, as it maintains air quality while minimizing energy waste.
Should I air-seal or insulate first?
Always air-seal before adding insulation. Air leakage can reduce insulation effectiveness by up to 50%. Additionally, many air-sealing opportunities become inaccessible once new insulation is installed, particularly in attics.
How do I know if air-sealing was effective?
The most reliable method is before-and-after blower door testing, which provides quantifiable measurements of air leakage reduction. Subjectively, reduced drafts, more consistent temperatures between rooms, and decreased dust are common indicators of successful air-sealing.
Is air-sealing a DIY-friendly project?
Certain components—like weatherstripping doors and windows, installing outlet gaskets, and caulking visible cracks—are very DIY-friendly. However, comprehensive air-sealing, particularly in attics and crawlspaces, benefits from professional equipment and expertise to identify and access all significant leakage points.
Frequently Asked Questions
How long does professional air-sealing typically take?
A comprehensive professional air-sealing project for an average home (2,000-2,500 square feet) typically takes 1-2 days. The process includes initial testing, sealing work, and verification testing. Larger homes or those with complex issues may require additional time. The most time-intensive areas are typically attics and crawlspaces, which often contain numerous penetrations requiring careful sealing.
Will air-sealing alone solve my comfort problems?
Air-sealing addresses drafts and temperature inconsistencies caused by uncontrolled air movement, but other comfort issues may have different causes. Insufficient insulation, duct leakage, improperly sized HVAC equipment, or moisture problems may require additional interventions. Air-sealing is typically the first and most cost-effective step in a comprehensive home performance improvement plan.
Do I need to leave my home during air-sealing work?
No evacuation is necessary during standard air-sealing work. Most air-sealing materials have minimal odors that dissipate quickly. The work can be performed while the home is occupied, though access to certain areas (like the attic or basement) will be needed during work hours.
Are there tax credits or rebates available for air-sealing?
Many utility companies and state/federal programs offer rebates or incentives for air-sealing projects that achieve measurable results. Current federal tax credits offer up to 30% of costs for qualified weatherization improvements, including air-sealing. Documentation of before-and-after testing is typically required to qualify for the maximum incentives.
How do I maintain air-sealing over time?
Most quality air-sealing materials will last 10+ years, but periodic inspection is recommended. Check weatherstripping annually and replace worn components. After any home renovations or new penetrations (like cable installations), ensure proper sealing around the new openings. Homes in areas with extreme temperature fluctuations may require more frequent maintenance of exterior seals.