Replacing a car windscreen is a common yet critical repair that ensures both the safety and integrity of your vehicle. Whether due to cracks, chips, or shattered glass, a damaged windscreen can compromise visibility and structural strength. Understanding what happens during the windscreen replacement process helps car owners appreciate the importance of professional service and what to expect when their vehicle undergoes this repair.
Understanding the Importance of Windscreen Replacement
The windscreen, or windshield, is not merely a transparent glass panel. It plays a vital role in protecting occupants from external elements like wind, dust, and debris, while also supporting the structural strength of the car’s frame. Modern windscreens are made of laminated safety glass, designed to prevent shattering into dangerous shards in the event of an impact.
Damaged windscreens reduce visibility, risk injury, and can lead to further damage if ignored. Replacing the windscreen promptly is essential for safety, legal compliance, and maintaining the vehicle’s value.
Signs That Indicate the Need for Windscreen Replacement
Before detailing the replacement process, it is helpful to recognize when a windscreen needs replacement instead of repair:
- Large cracks extending across the glass
- Multiple cracks or chips clustered together
- Damage located in the driver’s direct line of sight
- Structural damage caused by impact or accident
- Signs of delamination, where the layers of laminated glass separate
In such cases, repair is not sufficient, and a full replacement is necessary to restore safety and integrity.
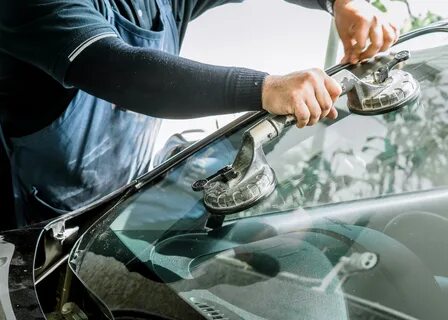
Note:- When the damage had been spotted, a Car Windscreen Replacement was immediately arranged. The faulty glass was removed, and a new one was securely installed. Safety and clarity had been ensured. Get in touch with Windmaster for smooth and stress-free service.
The Car Windscreen Replacement Process
Replacing a car windscreen is a precise and methodical process that involves several key steps. These steps ensure the new glass fits perfectly, seals correctly, and provides the required safety standards.
Step 1 The Initial Inspection and Preparation
When the vehicle arrives for windscreen replacement, a technician performs a thorough inspection. This includes:
- Assessing the extent of damage to determine if replacement is necessary
- Checking the model and make of the car to source the correct windscreen
- Inspecting surrounding trims and seals for damage or wear
After confirming replacement is required, the technician prepares the vehicle for the procedure. This involves protecting the interior and exterior surfaces to prevent scratches or dirt during the process.
Step 2 Removing the Damaged Windscreen
Removing the old windscreen is a delicate task. The process generally includes:
- Removing any trim or moulding that secures the windscreen to the vehicle frame
- Carefully cutting through the adhesive or sealant bonding the windscreen in place
- Using specialized tools such as cutting wires or cold knives to separate the glass without damaging the car’s body or paintwork
- Gently lifting the damaged windscreen out of its frame and safely disposing of it
Technicians must take care to avoid any damage to the vehicle’s paint, trim, or structural components during removal.
Step 3 Cleaning and Preparing the Pinch Weld
The pinch weld is the metal frame area where the windscreen sits and adheres. Preparing the pinch weld is a crucial step to ensure the new windscreen bonds correctly:
- Removing any remaining adhesive or sealant residue from the previous windscreen
- Cleaning the surface thoroughly to remove dirt, dust, or corrosion
- Inspecting the metal for any rust or damage and treating it if necessary to prevent future corrosion
- Applying a primer to the pinch weld to improve adhesive bonding and prevent rust
Proper preparation of the pinch weld directly affects the quality and durability of the replacement.
Step 4 Applying the Adhesive
Modern car windscreens are bonded to the vehicle using strong, specially formulated adhesives that cure quickly yet provide lasting strength. The adhesive must be applied carefully to:
- Ensure even distribution around the pinch weld or frame
- Avoid gaps or weak spots that could cause leaks or windscreen failure
- Allow the windscreen to be securely held in place while curing
The type of adhesive and curing time may vary depending on the vehicle model, adhesive technology, and environmental conditions.
Step 5 Installing the New Windscreen
Once the adhesive is applied, the new windscreen is carefully positioned and installed:
- The technician aligns the glass precisely to the frame using reference points on the vehicle
- The windscreen is gently pressed into place to create a strong bond with the adhesive
- Trims, mouldings, and seals removed earlier are reinstalled to complete the look and seal
- The technician checks for proper fitment, ensuring no gaps or misalignment
Proper installation is critical to maintain the windscreen’s structural role and prevent issues like leaks or wind noise.
Step 6 Curing and Final Inspection
After installation, the adhesive must cure fully to ensure a strong bond:
- Curing time depends on the adhesive type, temperature, and humidity, ranging from 30 minutes to several hours
- The vehicle is kept stationary during curing to prevent displacement or weak bonding
- Once cured, the technician performs a thorough inspection to check for leaks, proper seal, and any imperfections
- The windscreen wipers, sensors, and cameras (if equipped) are tested and recalibrated as needed
Some modern vehicles require recalibration of advanced driver-assistance systems (ADAS) such as lane departure warnings or automatic braking, which rely on sensors mounted on or near the windscreen.
Safety and Aftercare Following Windscreen Replacement
After a successful windscreen replacement, there are important considerations for vehicle owners to ensure safety and longevity:
- Avoid driving the car aggressively or at high speeds until the adhesive cures completely
- Keep the windscreen area dry and avoid washing the vehicle for at least 24 hours
- Regularly inspect seals and mouldings for signs of wear or leaks
- Schedule calibration of ADAS features with professional service centers if not done during installation
Following these guidelines helps preserve the integrity of the new windscreen and protects vehicle occupants.
Common Questions About Windscreen Replacement
Many car owners have questions about the windscreen replacement process. Here are answers to some frequently asked questions:
Is windscreen replacement covered by insurance?
In many cases, comprehensive car insurance policies cover windscreen replacement, sometimes without affecting no-claims bonuses. Always check with your insurer before proceeding.
How long does windscreen replacement take?
Typically, the replacement itself takes about 1 to 2 hours, but curing and safety checks may require additional waiting time.
Can I drive immediately after replacement?
It is generally recommended to avoid driving for at least one hour after replacement, but follow your technician’s specific advice regarding adhesive curing times.
What if my car has sensors or cameras on the windscreen?
Professional replacement includes recalibration of these systems to ensure they function correctly, often requiring specialized equipment.
Conclusion
Car windscreen replacement is a precise and safety-critical repair that involves multiple careful steps, from initial inspection to final calibration. Understanding the process helps car owners appreciate the expertise required to maintain vehicle safety and performance. Always entrust windscreen replacement work to trained professionals who use quality materials and follow manufacturer guidelines.
For More Insightful Articles Related To This Topic, Feel Free To Visit: BDnews55